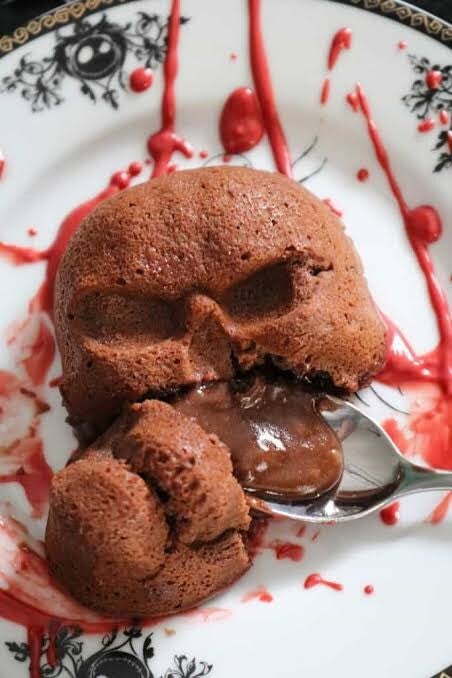
Bleeding Skull Red Velvet Lava Cakes. These decadent individual lava cakes deliver classic 80s creature-feature horror energy. Breaking into the outer red-velvet cake shell releases a molten chocolate-raspberry centre that oozes like a fresh monster bite.
Bleeding Skull Red Velvet Lava Cakes - Ingredients

Prep time: 20 mins | Bake time: 12–14 mins | Yield: 4 individual cakes

Ingredients

  • 100g dark chocolate (70%), chopped

  • 100g unsalted butter

  • 2 large eggs + 2 egg yolks

  • 75g caster sugar

  • 1 tsp vanilla extract

  • 1/2 tsp red gel food colouring

  • 25g plain flour

  • 1 tbsp cocoa powder

  • 4 tsp seedless raspberry jam (for the "blood" core)

  • Butter & cocoa powder (for greasing ramekins)

Instructions if you dare

Instructions

1.Prep the Ramekins & Oven:Prerequisite for a clean release.

Preheat your oven to 200°C (180°C fan / Gas Mark 6). Generously grease four 175ml ramekins (or skull-shaped silicone moulds) with butter and dust with cocoa powder, tapping out any excess.

2.Melt Chocolate & Butter:

Combine the dark chocolate and unsalted butter in a heatproof bowl. Set over a pan of simmering water (double boiler) and stir until smooth. Remove from heat and cool slightly.

3.Whisk & Add Colour:

In a separate bowl, whisk the eggs, egg yolks, sugar, vanilla, and red gel colouring together until pale, thick, and doubled in volume.

4.Combine & Fold:

Gently fold the melted chocolate mixture into the eggs. Sift in the plain flour and cocoa powder, folding until just combined without deflating the batter.

5.Load the Molten Core:

Divide half the batter among the prepared ramekins. Drop 1 teaspoon of seedless raspberry jam directly into the centre of each, then cover with the remaining batter.

6.Bake & Serve Hot:Watch timing closely to keep the centre liquid.

Bake for 12–14 minutes until the edges are firm but the center has a slight wobble. Run a thin knife around the edges, invert onto plates, and serve immediately with a splatter of extra raspberry jam.


Nutritional Highlights

Key Nutritional Highlights

  • Antioxidant Boost from Dark Chocolate: Using 70% dark chocolate delivers a good dose of flavonoids and cocoa polyphenols, along with essential minerals like iron, magnesium, and copper.

  • Rich Energy Source: The combination of butter, chocolate, and whole eggs provides a high-density release of energy, making it an indulgent, rich treat.

  • Micro-Nutrients from Eggs: The addition of extra egg yolks provides fat-soluble vitamins (A, D, and E), choline, and high-quality protein to support satiety.

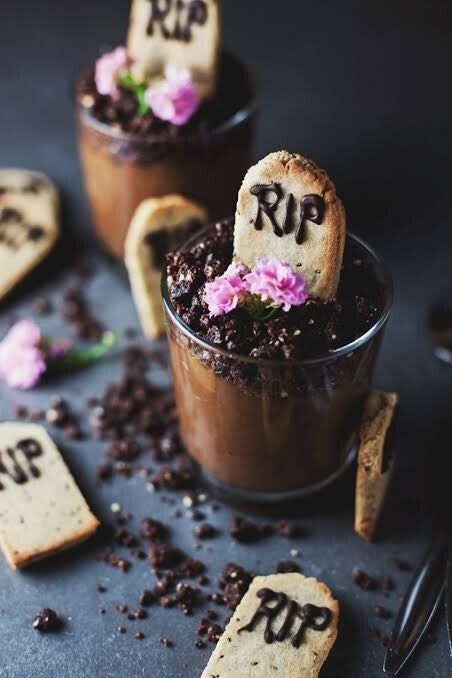
Cryptkeeper’s Graveyard Chocolate Mousse Pots. Channelling peak 80s creature-feature vibes, these velvety dark chocolate mousse pots double as a literal graveyard. Layered with crushed cookie "dirt" and anchored by hand-decorated shortbread tombstones, it’s a terrifyingly easy dessert that looks like it walked right off a cult-classic movie set.
Cryptkeeper’s Graveyard Chocolate Mousse Pots Ingredients

Prep time: 30 mins (plus chilling) | Yield: 4 individual graves

Ingredients

For the Chocolate Mousse:

  • 200g dark chocolate (min 60%), chopped

  • 300ml double cream (cold)

  • 3 large eggs, separated

  • 2 tbsp caster sugar

  • 1 tsp vanilla extract

  • A pinch of salt

For the Graveyard Assembly:

  • 8 store-bought shortbread finger biscuits (shaped like headstones)

  • 50g dark or milk chocolate (melted, for piping "R.I.P.")

  • 100g chocolate sandwich cookies (like Oreos), crushed into fine "dirt" crumbs

Instructions if you dare

Preperation 


1.Craft the Tombstones:Set the scene.

Melt the 50g of chocolate and spoon it into a piping bag or a ziplock bag with a tiny corner snipped off. Pipe "R.I.P.", cracks, or small skull motifs onto each shortbread finger. Set aside to harden completely.

2.Melt & Whip the Chocolate:Whip the base.

Melt the chopped dark chocolate in a heatproof bowl set over simmering water, then let it cool slightly. In a clean bowl, whip the double cream until soft peaks form and set aside.

3.Build the Mousse Base:Fold for ultimate silkiness.

Whisk the egg yolks, vanilla, and sugar into the warm melted chocolate until smooth. In a separate bowl, whip the egg whites with a pinch of salt until stiff peaks form. Gently fold the whipped cream into the chocolate, then fold in the whipped whites in two batches to keep it light and airy.

4.Fill the Pots:Layer the crypt.

Spoon the rich chocolate mousse into four individual glass jars or dessert cups. Chill in the fridge for at least 2 hours until fully set.

5.Bury Them Deep:The final unearthing.

Just before serving, cover the surface of each chilled mousse pot with a thick layer of crushed chocolate cookie crumbs to mimic freshly dug earth. Push a decorated shortbread tombstone upright into the center of each pot. Serve immediately with extra crumbs scattered across the table.


Nutritional Highlights

Nutritional Highlights

  • Flavonoid & Polyphenol Rich: Premium dark chocolate (60% or higher) delivers natural plant antioxidants that support heart health and reduce oxidative stress.

  • Satiating Fat Profile: The combination of double cream and dark cocoa solids provides a rich source of fats that make a small portion deeply satisfying.

  • Essential Micronutrients: Real egg yolks add a solid dose of choline (vital for brain health), fat-soluble vitamin A, and selenium, while dark cocoa provides trace minerals like magnesium and iron.

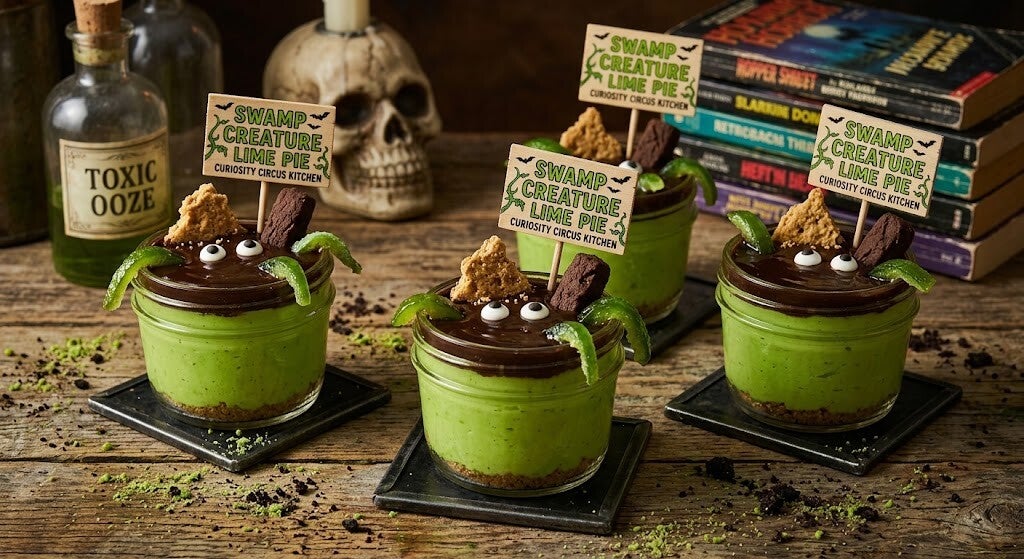
Swamp Creature Key Lime Pie Jars. Inspired by 80s creature-features and toxic slime tropes, these individual pie jars feature a buttery biscuit crust, a tangy neon-green lime filling, and a layer of dark chocolate "tar sludge" with creature features peeking out.
Swamp Creature Key Lime Pie Jars Ingredients

Prep time: 20 mins | Chill time: 2 hours | Yield: 4 mini jars

Ingredients

For the Biscuit Base:

  • 120g Digestives or Graham crackers, crushed

  • 50g unsalted butter, melted

For the Toxic Lime Filling:

  • 200g condensed milk

  • 150ml double cream

  • Zest and juice of 3 fresh limes

  • A tiny drop of neon green gel food colouring

For the "Tar Sludge" & Creature Decor:

  • 75g dark chocolate, melted

  • 50ml double cream

  • 8 candy eye sugar decorations

  • Gummy worms or gummy candy tendrils

  • Broken biscuit pieces (for "sunken debris")

Instructions if you dare

Preparation 

1.Build the Biscuit Base:Form the bedrock.

Mix the crushed Digestives and melted butter together until it resembles wet sand. Divide evenly among 4 small glass jars, pressing lightly into the bottom.


2.Whip the Slime Filling:Bright neon green setup.

In a bowl, whip the double cream until soft peaks form. Fold in the condensed milk, lime zest, lime juice, and a tiny dab of green gel colouring until smooth and thickened.


3.Fill & Chill:Set the swamp.

Spoon the green lime filling over the biscuit bases in each jar. Smooth the top with a spoon and chill in the fridge for at least 2 hours to set.


4.Make the Tar Sludge:The dark murky layer.

Heat 50ml double cream until warm, then pour over the 75g chopped dark chocolate. Stir until a smooth, dark ganache forms. Pour a layer over the top of each chilled green lime pie.


5.Decorate the Creature:Awaken the monster.

While the chocolate is soft, nestle two candy eyes into the top so they peek out of the "sludge." Add a couple of gummy worms crawling over the rim and broken biscuit debris sinking into the surface.


Nutritional Highlights

Nutritional Highlights

  • Vitamin C Boost from Fresh Limes: Using real lime juice and zest delivers a hit of natural Vitamin C, which supports immune function and boosts skin health.

  • Calcium & Mineral Content: Sweetened condensed milk and double cream provide a rich source of dietary calcium, phosphorus, and fat-soluble vitamins.

  • Polyphenols from Dark Chocolate: The dark chocolate "tar sludge" topping adds heart-healthy cocoa polyphenols and plant-based antioxidants.

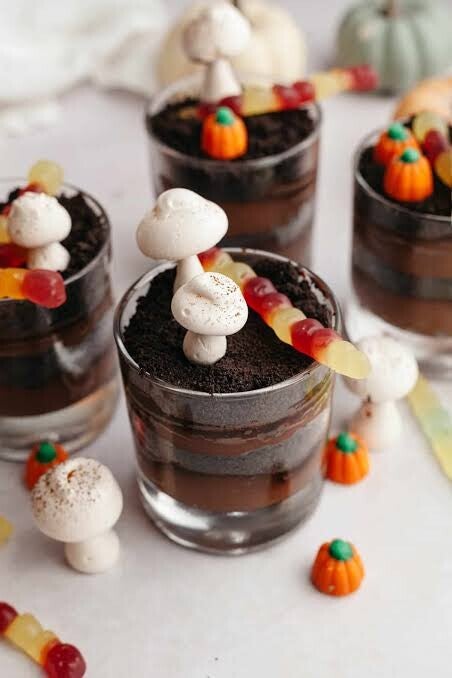
Graveyard Dirt Pudding Cups. This desert recipe combine rich chocolate pudding, crushed Oreo "dirt," and spooky toppings like tombstone cookies and crawling gummy worms.

Graveyard Dirt Pudding Cups - Ingredients

Prep time: 15 minutes | Servings: 6 individual cups

Ingredients

  • 1 package (3.9 oz / 110g) chocolate instant pudding mix

  • 2 cups (480ml) cold milk

  • 1 cup (240ml) whipped topping (or heavy whipping cream, whipped)

  • 1 package (14.3 oz / 400g) Oreo cookies, crushed

  • 12–18 gummy worms

  • 6 rectangular cookies (such as Milano cookies)

  • Black edible icing or melted dark chocolate (for writing)

Instructions if you dare

Assembly


1.Prepare the Pudding Base:

Whisk the instant chocolate pudding mix and cold milk together in a bowl for 2 minutes until smooth. Let it stand for 5 minutes to set, then gently fold in the whipped topping until fully combined.

2.Crush the Cookies:

Place the Oreo cookies into a sealed zip-top bag and crush them using a rolling pin until they resemble fine topsoil.

3.Layer the Parfaits:

In 6 clear plastic or glass cups, layer 2 tablespoons of crushed Oreos at the bottom, followed by a layer of chocolate pudding. Repeat the layers, finishing with a thick layer of crushed Oreos on top to form the "dirt."

4.Decorate with Graveyard Details:

Use the black edible icing to write "RIP" on each rectangular cookie to craft mini tombstones. Press one cookie tombstone halfway into the top of each cup, then stick gummy worms into the dirt surrounding it. Chill for at least 30 minutes before serving.


Nutritional Highlights

Nutritional Highlights

  • High Energy & Fast Carbs: The combination of cookies, pudding, and candy provides a quick burst of energy, making it a rich, indulgent treat.

  • Calcium & Minerals: Milk in the instant pudding base provides a small dose of essential minerals like calcium and phosphorus.

  • Lower Saturated Fat Option: Using 2% or skim milk and light whipped topping keeps the saturated fat relatively low for a chocolate dessert.

Whilst you enjoy your ghoulish spooky food, why not pop over to CuriosityCircusArt.co.uk to shop some spooky art and acrylic paintings!